These are the following lists on how to conduct a test run by doing installation on your equipment:
Materials and equipment required:
- Items to mix.
- (Only for hazardous items) Safety goggles
- Rubber and latex disposable gloves (for food-grade items and to keep hands from getting greasy)
- Hairnet and/or beard net (only made of food-grade materials)
- Sterile shoe coverings (only made of food-grade materials)

You should follow this instruction:

You must wear latex or rubber gloves and if necessary, use food-grade clothing, while completing this step.
1. Properly clean the mixing tank.
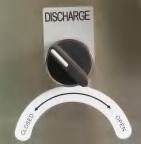
2. Check always to make sure the discharge chute is shut.
3. The machine should be plugged in and used without powder at first.
- Attach the device to the power source.
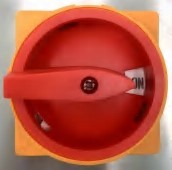
- Place the ON position on the main power switch.

- Note: Keep an eye out for any strange behavior from the system. Make sure that the ribbons stay away from the mixing tank.
4. To supply electricity, turn the emergency stop switch clockwise.
5. To see if the ribbon rotates normally and in the right direction, press the "ON" button.

6. Open the mixing tank's lid and add materials one at a time, beginning with 10% of the total volume.
7. To continue the test run, click the Start button.
8. Gradually increase the material until 60% to 70% of the mixing tank's capacity that has been reached.
Reminder: Don't fill the mixing tank above 70% of its capacity.
9. Connect the supply of air.
Join the air tubing in the first position.
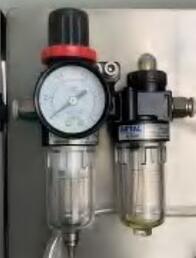
Typically, 0.6 Pa of air pressure is enough.
(Pull position 2 up and, if required, swivel it to the right or left to adjust the air pressure.)
10. To verify if the discharge valve is operating correctly, turn the discharge switch to the ON position.
Post time: Oct-23-2023